Showing posts with label Beauty. Show all posts

Tuesday, March 27, 2012

Beauty Tips

Wouldn't it be nice to have all your beauty tips and tricks in one spot?  Well today I am going to highlight some of our favorites here at Ma Nouvelle Mode.  These are tutorials we have done in the past and since Christie and I are preparing for our big relaunch next week, we are recapping a bunch of fun stuff for you this week!  Let's get started!

This first one was a really fun post to do.  We were selected to as a part of Daily Buzz: Style's top 9 for a day to night makeup challenge.  So I did my take on Day to Night makeup ideas.  Here's what I came up with:

Next is one of my favorite makeup posts.  I have recently become obsessed with bold lip colors.  It feels like if I am not wearing a red or a pink, my look is not complete.  Therefore, I had to write a post on How to Wear Bold Lip Colors.  It was featured on The SITS Girls as well!  I had fun with it because I did a little stop-motion video to go a long with it.  I am no professional and do not claim to be, but I thought it was cute, and the French music definitely helped it along!


I also wrote a post back in December about my waxing experience here in France.  It's rather funny, because it's a rather funny experience!  But if you get a chance to read it, make sure you also check out the comments as well, people are hilarious!

That's all for today folks, hope you enjoyed it and have a great day!

We'll be linking up to all the parties here.
 
  Follow Ma Nouvelle Mode

Monday, March 26, 2012

Hair Ideas

Happy Monday Everyone!

If you didn't already know, Christie and I are re-launching Ma Nouvelle Mode next week with a new design, move to wordpress, and a whole lot of awesome!  We are really excited to reveal everything to you.  In the meantime, as we are working so hard to prepare, we have decided to take this week off from new posts.  This does not mean that we will be around or even have posts!  We wouldn't want to leave anyone hanging!  So instead we decided to do a little recap of some of our favorite posts in some of the categories we write about.

And what a better way to start a Monday than with hair ideas!  We have done quite a few and they seem to be ever so popular, so in case you missed them or are a new reader or just need a refresher, here are some of our favorites.

No Heat Curls is the most popular so far with over 1,600 views on YouTube.


Our second viewed is my high bun with poof.  I love this one because it is easy to do and cute but you hair is still up and out of your face.


Here is one of my personal favorites, because I love big hair and all, Sarah Jessica Parker big hair.  It's so fun and easy!

This next hairstyle I personally loved.  I did it in Fall, so I called it a fall hairstyle, but really it's perfect whenever!
Here's the video for it:


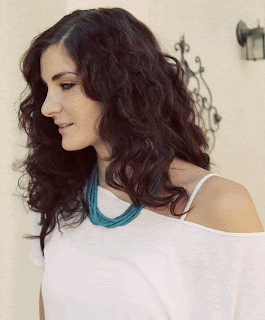
Last one I will share is more recent and is Christie's first hair tutorial!  I loved it and it has done really well on YouTube as well.  It is how to style loose curls on short hair.  In fact, it got featured over at 30 Handmade Days for most viewed!  Here is the picture:
And here is the video:


Need some more ideas?  We have plenty!  (And SO much more to come!) Take a minute and peruse our hair archives for some more inspiration!

And stay tuned!! Next week is the big relaunch!! :)  Happy Monday!

We are going to be linking up this post to all our link parties here.

  Follow Ma Nouvelle Mode

Friday, March 16, 2012

Spring Makeup Trends

Aahhh springtime!  Isn't it something we all look forward to after those long, cold winter months?  I know I do!  When the sun starts to shine and you start to feel the warmth on your skin... oh, so lovely.  Another fun thing about spring is that it brings with it a wave of new styles and colors to brighten your day!  These colors are reflected in our wardrobe, maybe even our skin tone and most definitely our makeup palette!  So I am going to talk to you about some fun makeup trends for Spring.  Ready?  Let's do it.

Fresh, Natural Face ~ This Spring we are seeing a lot of fresh faces out there.  All this means is that less is more!  No more heavy, dark makeup, or tons of foundation.  Just some concealer if needed, light foundation, and mascara is beautiful.  It is kinda refreshing to change it up and let your face breathe.  Try adding a little bronzer to your T-zone to make it seem like your face actually did see the sun for the last 4 or 5 months! (all the while wearing sunscreen underneath!)

Colors ~  Spring most definitely ushers in a beautiful array of bright fun colors.  I'm not talking about bringing back the eighties or anything (although I think they're trying to make a comeback), just enough to brighten up your face and leave the dark colors in the winter.  Personally, I also think it can help in brightening your mood!  Here's how you can bring more color to your face:
  • Lips - I talked about how to wear bold lip colors back in January, so I hope you have all taken that challenge and rocked it yourself!  Spring is a perfect time to continue to rock the red, but also to add some bright pinks/ fuchsias, sheer light pinks, or even some orange if you're brave enough!
  • Eyes - I love to keep my eye colors light and simple.  We see a lot of this for Spring which I am absolutely loving.  Try some sheer or shimmer instead of dark and smokey.  If you want to do a smokey eye, experiment with using pinks, purples, golds, and metallic colors.  But always be sure to keep the inner corner of your eyes light to keep them bright and cheery!  {A smile helps with that as well!}
  • Cheeks - Once again, bring on the color!  Pinks, shimmers, or a beautiful bronze color on the cheeks is  a must-have in spring.  Especially when you add it to a beautiful, fresh face, you have all you need!  Try a tan/pink blush to add some color to your cheeks and your skin tone as well.

Brown Liner - Spring is a great time to step away from dark, black liner and move into softer brown colors.  They go great with the brighter, lighter colors discussed above and give you less of a harsh look.  You can still rock the smokey eye for girls night out and all, but for more of a softer Spring-y look, use the brown.

Prominent Brows - This one goes perfectly with our natural fresh face -- in fact with any of them!  It has been seen throughout all the runway shows and is big this spring.  Thankfully, my mom never let me pluck or wax my eyebrows too thin, but if yours are, try filling them in with a shade a tad bit darker (not too dark!) to add prominence.  You can also try growing them in if possible.  Just let your aesthetician know.  They may be able to help!

So there you have it!  Some popular spring makeup trends for 2012!  Now let me be clear here, these trends are not meant to be used all together.  They are just ideas for you to create a new, fresh look for a new {and hopefully fun} season!

Have a great day!

 - Natalia

Friday, March 2, 2012

Loose Curls for Short Hair

Guys, I did my first hair tutorial. I will admit it, I feel like total dork talking to the camera. In fact. I need to emphasize that point again....... I feel like SUCH a DORK!!! First of all since this was my first tutorial I learned a few things: Like look at the camera....clean the mirror first......don't say the same thing over and over....etc. But even with all the stupid stuff that embarrasses me I LOVE this hair style on me right now, so I am going to still post the tutorial. My hair is at a totally strange place with length and there really is only so much I can do that feels fun and chic.
And just as a note: this method of curling/waving works on ALL length of hair so if you have long or medium length hair this will look amazing on you too! 

Ok here it is.......GAH!


Go easy on me! Xoxo- Christie

Follow Ma Nouvelle Mode

Thursday, February 2, 2012

Lauren Conrad Braided Bun

Good Morning everyone!

I have been in a little bit of a funk this last week.  Maybe it's because I just got home from a vacation, you know the post vacation slump, like 'what?? I have to do stuff? This is real life now?' kinda thing.  Or maybe because it hasn't.stopped.snowing. for like three days straight and I'm from southern California.  The way our house is situated, it makes it hard to leave without your car literally sliding down the hill.  So maybe I have cabin fever.  Whatever it is, I need a little pick me up.  I shared this tutorial over at 30 Handmade Days a couple weeks ago, where I am a beauty contributor, and I thought I would share it with you all as well.  Hope you enjoy!


Although the pictures don't exactly match, it's the same hairstyle!  


Start with parting your hair to one side.  Leave out a section in the front to use later and bring the rest of it over to the side of your choice.


Braid to your side of preference and secure with an elastic.  I would suggest using a clear one or a color that matches your hair color.


Starting at the top of the braid, loosen the braid.  Don't pull pieces entirely out, but enough to give your braid more volume.  It's the same idea I used in my big poofy french braid here.

Then wrap the hair up and around, bringing it forward first.


Once it is wrapped around and in a pretty little bun, secure it with bobby pins.  Try to make sure that you elastic isn't showing.


Then take the remaining piece of hair that you originally left out and lightly twist it back and around the bun, securing with bobby pins.  Mine looks a tad bit different than Lauren's because I have bangs so it didn't hang down as much in the front.  If yours wasn't curled a bit already like mine was, add a few big barrel curls away from your face so it will smoothly go back.  And if any hair falls out of the front, they are nicely curled!


That's it! Apply a little hairspray if you need it, but otherwise, voila!  Isn't it easy?  I hope you give this a try next time you're out and about.  You might recognize the picture.  I wore this hairstyle with my green Zara shirt outfit.

Inspired to try a new hairstyle?  I hope so!! Thanks for reading and have a great day!

Now if I could just get out of my pajamas....


Follow Ma Nouvelle Mode

Friday, January 27, 2012

Fun & Easy Nail Art

Good Morning everyone! 

I just got back from Sweden yesterday and it was a beautifully wonderful trip.  I got to spend some time with my good friend who lives there.  She is American, speaks English, her husband plays basketball, and travels with her hubby!  If you are a fellow expat, you completely understand how much those things mean.  If you aren't, let's just say, I don't have too many English speaking friends here in St. Etienne.  

Now before I left, of course I had to get all girlied up.  Aside from my sweet little Tae, who always notices when 'mommy looks pretty,' most people 'round these parts don't really notice.  I particularly liked these pretty little nail decals because I rarely do my nails.  I can't do them nicely, they take too long to dry, and inevitably I always mess them up!  I also have big, ugly man-hands, but that's another story.  Enter in these beauties:


They are so easy to use.  I must admit, I was a little skeptical at first, but I thought I would give it a try.  Glad I did!
 You just peel the sticker off, which is a type of nail polish sticker or something, and press it to your nail.  If it isn't perfect you can lift it up and apply again.  It won't affect the stickiness of the decal.

Once you have it one the way you want it, you can tear off the access and voila!  You just painted your nails! With pretty bows at that!

 No smudges, no mess ups, no redos, and no messy left hand!  Does it help the man-hand problem?? #notsomuch

What do you think, would you rock these?  They have quite a few options, french tip, polka dots, flowers.  As a matter of fact, if you keep and eye on our Facebook page today, you could win a pair!! (Giveaway closed)

Linking up to all the parties in my link page and some other great ones here.

Happy Friday!


Follow Ma Nouvelle Mode

Friday, January 20, 2012

Daily Buzz Style 9x9 - Day to Night Makeup Look

Good Morning, everyone, and Happy Friday!!  I hope that this week has been treating you well and you are ready for the weekend!  I know I am.  I am leaving for Sweden on Sunday!!!  Without the kids!  Can I get an amen??  AMEN!

Have you ever heard of Daily Buzz?  You should check it out if you haven't.  Basically, they scour the Web looking for the best content in a related category.  They have Daily Buzz: Style, Moms, Healthy Living, Luxe, and Tech.  Well, I have been selected to create a day to night makeup look and compete with 8 other bloggers to win!!  I am so excited about it and obviously, it was a lot of fun to do.  

As you might know, I am a mom.  What you might not know is that I used to work.  I used to supervise people two and a half times my age.  I used to have anywhere between 40 to 60 people under me.  When I was 23.  But now I supervise two very adorable, yet very challenging little boys.  There are lots of car noises, bodily functions, racing, falling, hitting, biting, and wrestling.  Can you guess which one was harder?  

So this project was fun.  I got to go back to my single days and act like I was going to work.  I put on a high-waisted pencil skirt and my new favorite booties just to fit the part.  Now I am sure there are women who read this blog who are single and hold a job.  Even mamas that juggle both worlds.  I am gonna take a guess here and say most people reading have held a job at some point in their life.  And I don't know about you, ladies, but when I get up in the morning, the last thing I am thinking about is super fancy makeup.  I still love to wear it, but I keep it super simple.  
I am going to start by showing you my everyday makeup.  I also kept in mind that the makeup I put on for daytime had to transition to my night look.  For example, although I think fake lashes look best with a smokey eye, I don't really want to wear a smokey eye to work.  Instead I paired it with a strong, black liner on the top lid.  Little more appropriate for the office, doncha think?

I also just chose a super glossy, sheer-pink lip gloss.  I  knew I was going to switch it up for the evening look, so I kept it simple.  My favorite is e.l.f. super glossy lip shine in Honey Do.  Love that stuff.  (And it's 1 buck at Target!)

Here's the skinny on my daytime eye makeup.  Start with a base.  I use concealer and a neutral tone shadow. You can also use a primer for your lids.  I added a beautiful brown-ish color to the creases.  Enough to add definition to my eyes, but not too much to make it too dark.  I blended it with a lighter color on the inner lids and a highlight on the brow bone.  Then finish it off with the bold, black liner and mascara.  You can also do a cat eye for some more fun!

Here is my finished look:
Pretty natural, kinda boring, perfect for work!  I also tied my hair up with a pencil because I figured that was appropriate!

Now here's where it gets fun.  Enter in some hot red lipstick.

You could probably stop there because a bold lip just adds so much to your look.  But that wouldn't be too fun, now would it?  So we are gonna amp it up and add some lovely luxe blush and powder.  The blush enhances your cheek bones and adds a little shimmer that is perfect for your night out.  The translucent powder is perfect to kinda refresh your foundation without having to add an entirely new face.  Some under the eyes can help freshen up any dark circles that might have formed during the day... that probably doesn't happen to you, but you know just in case.  
Now the final pizzazz!  A night out is not complete without a set of false lashes, if you ask me.  I love them and wish I could have them permanently sewn onto my lids or something.  I try to wear them every chance I get.  
These particular lashes are rather long and would look better with a smokey eye.  But they were fun to rock anyway!

Now go ahead and take that pencil out and let yo hair down, ladies!  Cuz it's time to paaaar-taaay!
Here is my final look:

Then some outfit posts as well.  Gotta get it in!


And two more pics of the final look:


So what do you think?  Do you like it?  Do you have any day to night supa tricks?

Now this isn't part of the deal with Daily Buzz: Style or anything, but I thought it would be super cool that, if you liked my ideas and my post, you head over to their Facebook Page (and like them if you are so inclined - they have some super awesome stuff!) and leave a comment saying you loved my post and that I sent you to say hi!  I would really supa love ya forever!

I hope you have a great weekend!  Maybe you can use these tips for tonight!


Follow Ma Nouvelle Mode

Thursday, January 19, 2012

Microdermabrasion at Home: Save your Skin and Your Money!

It’s a sad but true fact – the older we get, the more important a skincare routine becomes. Even if you’re not yet worried about fine lines or wrinkles, perhaps you have another skin issue: adult acne, uneven pigmentation, dry or dull skin. Cleansing, moisturizing, and using sunscreen are all important to maintaining a healthy glow, but sometimes it’s nice to step it up a little with something like a microdermabrasion treatment. These exfoliating treatments slough away dry, dull surface skin to reveal baby-soft skin underneath, and until recently, were a coveted (and expensive!) spa or salon treatment. However, recent advances in products have made microdermabrasion at home a reality. So save your skin and your money with some of these at-home microdermabrasion pointers.

You will need to find a great kit, preferably one that comes with an exfoliating wand and a few products to try: a scrub, moisturizer, cleanser, etc.  A great example is the PHF DermaWand, which comes with several products and an instructional DVD to guide you to spa-worthy skills.  If a full-on microdermabrasion kit seems intimidating, you can also try a simple scrub like ISOMERS Reveal N’ Renew Thermal Microdermabrasion Mask, which still yields great results by deep-cleaning your pores and exfoliating dead skin away.  Both of these products and much more are all available online at retailers like ShopNBC, making microdermabrasion at home even more convenient. Whichever route you may choose, it’s important to build up to a microdermabrasion routine, especially for those with sensitive skin.  Try using the products just once to see how your skin reacts, and then gradually build up to a comfortable routine. With microdermabrasion at home, your skin – and your wallet – will thank you. 


Hope this was helpful, I am definitely looking into it!  I don't know if it is the obvious wrinkles around my eyes are the fact that my perfect-skinned husband never ages, either way I want to make sure I am taking the best care of myself!  You can take a look around some at home microdermabrasion kits at the link above.

What do you think, have you ever done microdermabrasion?  Have you tried a kit at home?  I would love to hear your experience!


Follow Ma Nouvelle Mode

LinkWithin

Related Posts Plugin for WordPress, Blogger...